
How to recover files from CD/DVD on Mac?
Looking to recover lost or inaccessible files from CD, DVD disc? Data loss via CDs and DVD is increasing day by day and everyone want to get solution of this question, how to recover files from CD/DVD disc. If you are using Mac OS then it is so easy to recover data by using 321Soft Data Recovery for Mac. Now, it has not become a big issue for many Mac users to care about recovery of lost data form CD/DVD.
Many computer users believe and might have known the reason behind giving up built-in CD-ROM in recently released Mac Book Air and Mac Mini by Apple Inc. However, the absence of CD-ROM in these two Apple’s products does not mean that it’s an end of CD and DVD. 321Soft Data Recovery for Mac has an easy to use wizard driven interface that helps you to recover your data from corrupted, damaged or unreadable CD and DVD easily. It allows you to recover files from disc with problems such as bad sectors, scratches or that just give errors when reading data. You can also save an image of the whole disc.


Step 1: Download and install the software.
First, you will need to download 321Soft Data Recovery for Mac and install it on your computer.
Step 2:Insert the damaged DVD or CD disc in the CD-R/RW drive.
From which device you want to recover data? You will need to insert CD or DVD in the CD Rom of your computer. After inserting optical media, you will be able to get back your lost data.
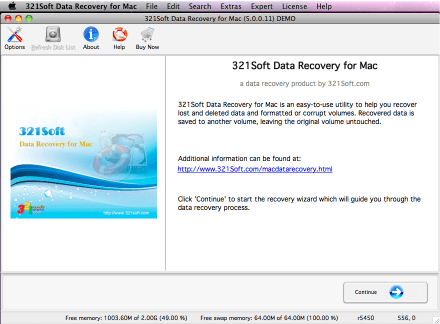
Step 3: Launch the software.
Previously, you have downloaded 321Soft Data Recovery software. Now for using that software you will need to open it from where you have installed. when run the software, It's interface will appear that will help user to go ahead step by step for completing recovery process.
Step 4: Choose Media Type
You will see an interface giving you Media Types. You may see 5 options including Hard Drives, Optical Media, Multimedia/Mobile Devices, Memory Devices, and RAID Systems. You will then select your required Media Type that would be Optical Media (CD/DVD).

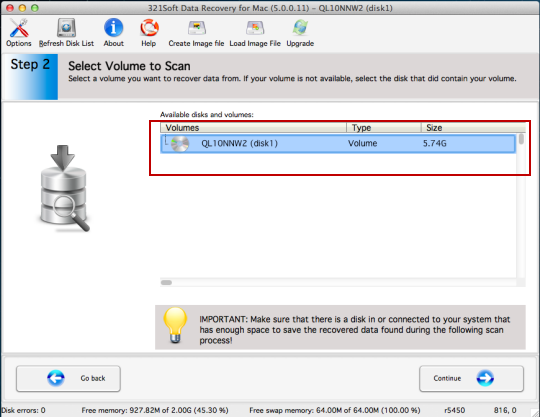
Step 5: Select available disk and volume to scan:
You will need to select desired volume in the next coming after choosing Optical Media. If your desired volume
isn’t available in listed volume then you may select Disk that contained volume.
Alternatively, You can can create an image file of the whole damaged or scratched disc by
selecting "Create Image File" button from toolbar. This can be useful when your CD/DVD Disc got broken
or damaged. You can create a backup image file for your disc to bypass bad sectors,
then recover files from the backup image file.
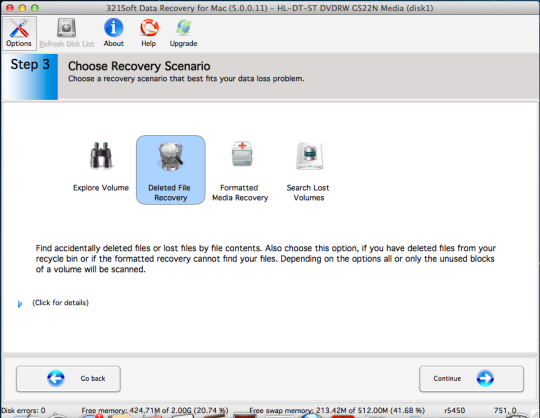
Step 6: Choose a Recovery Scenario :
In which mode do you want to recover your CD/DVD ? If your files is lost or deleted then you should select Deleted File Recovery mode. In case of other scenario, you will then need to choose required scenario from listed one and Click on "Continue" button.
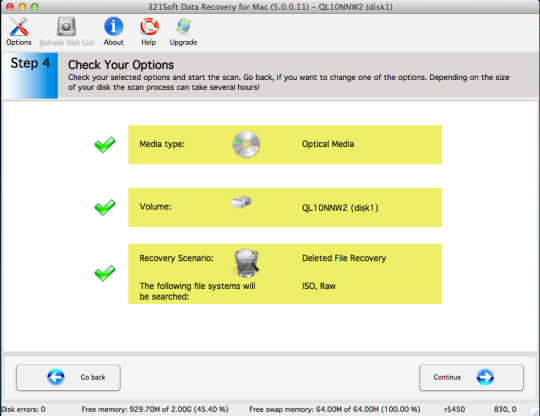
Step 7: Check your selected options:
Check (tick mark) your required option form options given below for starting scan through software. If you are not satisfied with previous options, click the "Go Back" button in the lower left corner. But if you are satisfied that you’ve done everything right then go ahead and start scan for recovering lost files from CD/DVD.
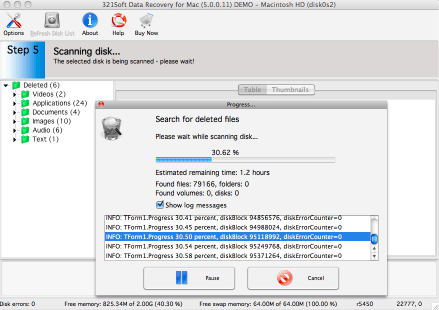
Step 8: Scanning CD/DVD:
The program will start scan your CD/DVD Disc. Depending on the size of your CD or DVD Disc the scan process can take a few minutes to come a few hours! Log messages will help you to do troubleshooting for the scan.
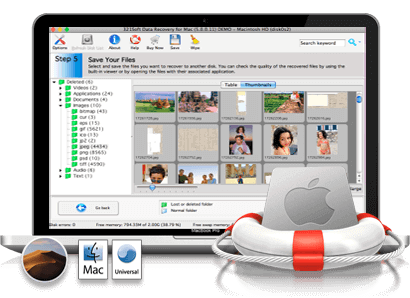
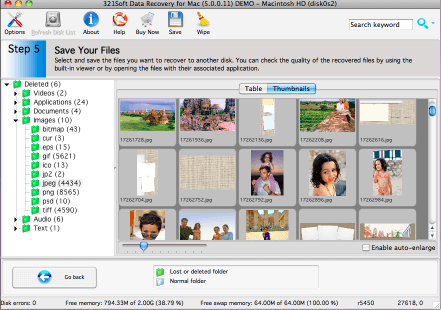
Step 9: Saving the recovered files:
After completion of scan, you will be able to have your lost files. Select files from the right side of
the screen and save selected files by selecting "Save" option from toolbar.
Find out why we're ranked #1
Ready to Recover CD/DVD on Mac? Just click the button below and Try CD and DVD Recovery now!